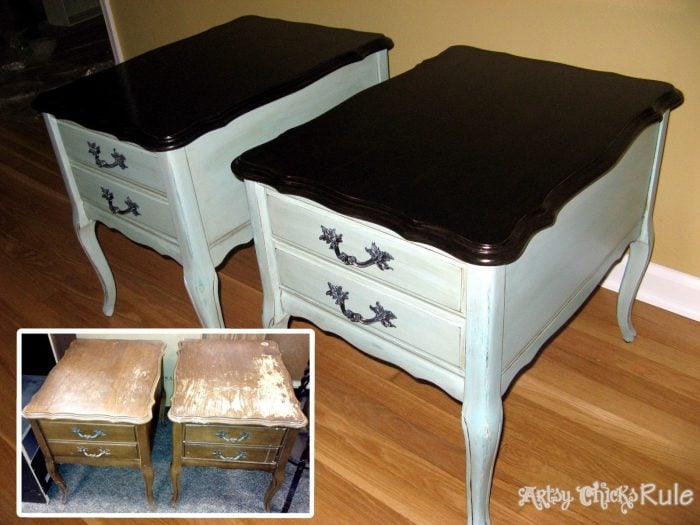
Turning an old outdated side table into a fancy one…![]()

Do you have an old side table gathering dust in a corner, begging for a new lease on life? Well, it’s time to unleash your creativity and transform that neglected piece into a fancy and stylish addition to your home decor. In this article, we’ll guide you through the process of turning an old outdated side table into a stunning masterpiece that will catch everyone’s eye. Get ready to embark on a fun and rewarding DIY project that will breathe new life into your furniture.
- Assessing the Potential: Start by examining your old side table and envisioning the possibilities. Consider its structure, material, and overall condition. Take note of any flaws or damage that need to be addressed before you begin the transformation process.
- Choosing a Design Concept: Decide on the style and theme you want to achieve with your revamped side table. Do you prefer a modern and sleek look, a rustic farmhouse vibe, or a glamorous and chic aesthetic? Browse design inspirations online or in magazines to find ideas that resonate with your personal taste and complement your existing decor.
- Preparing the Surface: Before applying any paint or finishes, it’s crucial to prepare the surface of the side table. Clean it thoroughly, removing any dirt, dust, or residue. If there are any rough patches or imperfections, sand them down to create a smooth and even base for the upcoming makeover.
- Selecting the Right Paint and Finish: Choose a high-quality paint that suits your design concept and the material of your side table. Whether you prefer bold and vibrant colors, soft pastels, or classic neutrals, the right paint can completely transform the table’s appearance. Additionally, consider adding a protective finish such as varnish or wax to ensure longevity and durability.
- Applying the Paint: Now comes the fun part—applying the paint! Use a brush or roller to coat the surface evenly, working in long, smooth strokes. Apply multiple coats as necessary, allowing each layer to dry completely before moving on to the next. Don’t forget to paint the legs and any intricate details to achieve a cohesive look.
- Adding Personalized Touches: Take your side table transformation to the next level by adding personalized touches. Consider incorporating decorative stencils, decals, or patterns to create unique designs. You can also experiment with different techniques like distressing or antiquing for a vintage appeal.
- Final Touches and Finishing Details: Once the paint has dried, it’s time to add the finishing touches. Replace old hardware with new knobs or handles that complement the revamped style. Consider adding decorative accents like metallic leafing, decorative trims, or even a glass or mirrored top for an extra touch of elegance.


Conclusion: Congratulations! You’ve successfully turned an old outdated side table into a fancy and stylish centerpiece for your living space. By following these steps and unleashing your creativity, you’ve given new life to a neglected piece of furniture. Remember, the possibilities are endless when it comes to up-cycling and transforming old items. So, don’t hesitate to embark on more DIY projects and let your imagination run wild. Enjoy your newly transformed side table and the satisfaction of breathing new life into forgotten treasures.